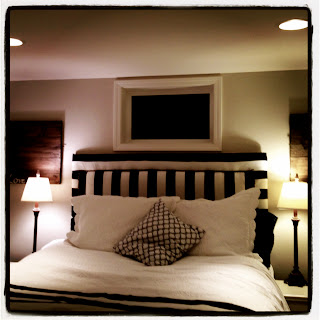
Tuesday, February 28, 2012

The Bench

Here it is.  Our first building project (not attached to a wall) that we used plans for:)  I am so happy with the way it turned out.  We had been looking for a bench for months.  I was thinking that I would find something I like, refinish it and then upholster the top.  But then I came across this post from a wonderful blog (that I will be using TONS more ideas from) and knew that this was going to be our bench:)  I am happy to say that I think I have finally found a hobby that we can ALL get use to:)  The kids have fun, we have fun...and we actually walk away with a finished piece!  Love that!  


The room is coming together.  We have a few more things to do in there and then we will move on to the next room:)  Okay, who am I kidding...I will be all over this house, I am NOT that organized:)
And here is the main inspiration....Pottery Barn Rustic Bench $249!  We saved $204!!!  WOOHOO!

Monday, February 27, 2012

Final Steps to the Door Casing

before paint

Not sure what is going on with this picture...but you get the paining idea:)

Here is the finished project!  We completed the painting and caulking making a world a difference:)  I am so happy with the end result:)  And so excited for the next project.  Watch out house...we are on a roll!!

Simple Organization

 This project was found on Pinterest the other day.  I would post the link but for some reason it is not agreeing with my computer right now.  I will try and post it later.  Anyway....the reason that we chose this little project is because I was tired of having my drawer (the one that contains all of my spoons, measuring cups, spatulas, etc. get stuck.  You know when it won't open all the way and you try your best to squeeze your hand in to the smallest opening usually ripping off a layer of skin from the back of your hand and puncturing the underside with either a veggie peeler or a pizza cutter?  Well, I wanted to make this occurrence happen less often!  So this handy little idea was to put up some wood (we chose some scrap trim...the original post used cut paint sticks) attached to the inside of your spice cabinet (assuming that the spices to not come all the way up to the doors...there has to be room for these to hang without hitting things) and then the little hooks were screwed in:)  Simple as that.  And WOW it makes a huge difference in my drawer.  Plus they are so handy now to get too!  Soon I am going to label above each of them to display their size, thus making it even easier to find:)  LOVE IT!  This was sure a long post for such a simple project:)  

Little Additions....

I am still working on the bedroom project.  The bench for the end of the bed is almost finished and I will post pictures soon.  But in the meantime these cute little pillows are doing their best to tie in the navy blue beach idea:)  I had fun making them on me new sewing machine.  Yes new.  I completely broke my other one trying to sew through, what seemed like, lead.  I am sure someone smarter than me can fix it...anyone? It would be have fun to have two set up...I would feel like I was in a workshop:) 

Wednesday, February 15, 2012

Finished Hallway Paint

Can you see it?  The paint is almost exactly the same color...so unless the light hits it right you may not even notice the change.  I love it!  Fun change to a tiny hallway.  And a great way to experiment with this whole gloss paint idea:)  Now what can I paint next...hmmmm.....

Tuesday, February 14, 2012

More Fun in the Hallway...

So as of the last post we began working on the door casing that leads to the hallway.  I have been looking at the doorway for too long I guess because as of today I decided it needed a little something extra.  So out came the paint!  For those of you that know me well...you know that I paint all.the.time.  I get bored of colors quickly...but today was more about style than color.  I decided to add some interest in the tiny space.  I took the paint horizontal.  I have seen it a million times before, this idea of painting the same tone but in a gloss version...and I decided to give it a try:)  I measured all the area and put the tape up.  No Dad, I did not use a level...I am just not that kind of gal:)  Anyway it is drying now but I thought I would post the progress...can't wait to take the blue tape off...patience Brooke, patience....

{Before}

 {The Beginning}
Cute little helper alert!
 {The Middle}
paint applied
 I will post the final picture here soon!  Hopefully tonight:)  So exciting!

Monday, February 13, 2012

Door Casing...Stage 1

 {Before}

Using Baylee's iphone (don't worry we did not buy it for her...it was dropped in water and did not work for 3 months so another one was purchsed...she now uses it for movies in the car, notice the rhinestone case...lovely:) to take a picture measurement for all the cuts.  This REALLY cut down on mistakes!
 {After...well we still have quite a few steps to take...but this is the halfway point}

Saturday, February 11, 2012

Kids Craft Table


In our house coloring and painting are pretty big deals:)  We have always used the kitchen floor or the kitchen table for these wonderful projects...but the time has come to make a space just for the kids.  We have a great long room that will be perfect for a craft space.  So far we have been working on the table and benches.  Next step is the organization of all the craft supplies:)  So here is the first step... (and I apologize for not having step by step pictures...we started these projects before I got the wild desire to post about them:)

{1} First step was to find the perfect little table.  We found ours at a local second hand store for $10.  What a steal:)  It had all the character we wanted for the table and it was the right size.  It used to be a side table.
{2} Depending on the condition of the table you would want to sand and/or prime it to prep for paint.  Ours was in great condition so we were able to paint (opted to spray paint it) right away (I could have sanded it down but as much as I love projects...I have no patience for those kind of tasks:).  It only took two coats of the satin blue and then I painted the top with Chalkboard paint for one more fun art surface.
{3}  Next it was time to construct the benches.  We actually have two kid size chairs but since this was originally a side table it was a little short for the chairs.  So we decided to make our very own benches.  Took a few pieces of wood, some screws, a circular saw and some imagination...and viola! we had benches.  Okay, okay...I know that I should give better instructions but since this was our first piece made from our minds it is not worth the effort of writing it down.  You could probably come up with a better way to do it yourself without me telling you our crazy way:)  I will get better at this...I will!
There will probably be an update with a picture of the completed benches soon....

Friday, February 10, 2012

To start the ball rolling...

Some people have new years resolutions...I have new projects:)  Once I get something in my head I have to move forward with it...or I start to lose sleep.  Seriously, I already have a sleeping problem and I would rather not add to the situation:)  Well, this project took all four of us helping out.  From picking out the wood to sewing the fabric...we were all together.  And that is the best kind of project.  It is not a big change but it sure made a difference in our room.  Fun for the moment:)  Wonder where the next whim will lead us....
 We still have about 100 nailheads to tack down...but other than that the headboard is almost done (I just re-covered one that I made a few years ago).  The wall pictures are the other project.  That was a fun one.  Easy too...just some boards, some stain and some paint. 
Here is the wall art project.  We took three 1x4's (26 inches long) and two 1x6's (26 inches long), stained them a walnut color and then attached two 1x2's down the length of the piece in the back to hold it all together.  Then I painted my favorite word in the corner.  Simple as that!

The "Smaller" things

Here are a few of the project ideas that I have in the cooker for the house.  These are called "smaller" due to the fact they are not attached to the wall:)  (oops a "bigger" one made it way in the post...can you find it? :)
Headboard Bench Tutorial at ~ Sweet Pickins

Floor Cushion Tutorial from ~ Living with Punks
How-To Panel wall found at ~ Decor Chick
Eagan Mirror found at ~ The Lettered Cottage
Kids Craft Table Idea found at ~ The Homemaking Cottage
Organization Creative found at ~ Infarrantly Creative
Kids Craft Station Idea Found at ~ Clean and Scentsible

The "Bigger" Things

Here are a few of the "bigger" things that I have in the cooker...they ARE attached to the wall:)
Door Casing Tutorial found at ~ A Charming Nest
 
Mudroom Storage Tutorial found at ~ A Charming Nest
 
Basement Door Idea found at ~ Down to Earth Style
Pillar redo idea at ~ Ontario Park Bungalow
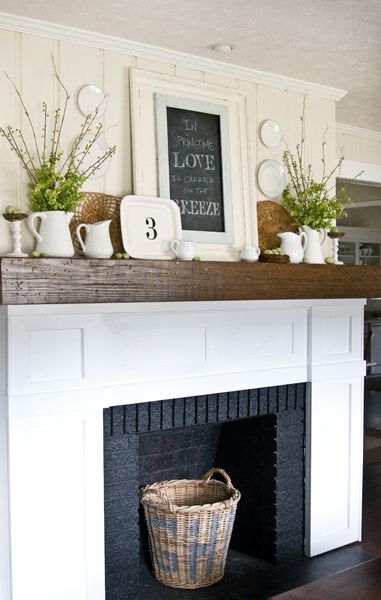
Mantel Inspiration found at ~ A Creative Beginning